Macros are scheduled for Gaea 2.3
A Macro packages a small node graph and lets you reuse it as a single node. In current Gaea builds, the node used to define Macro inputs and outputs is MacroPort.
Edition availability:
Indie: install and use existing Macros.ProfessionalandEnterprise: create and use Macros. These editions also includeExpose Parameters,Variables and Expressions, andAutomation.
See Compare Editions.
Macro structure
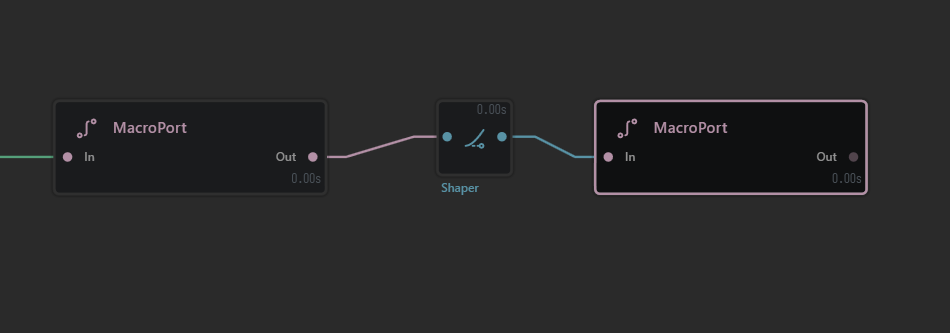
A Macro graph is typically:
- In: a
MacroPortnode set toDirection = Input - Out: a
MacroPortnode set toDirection = Output - One or more processing nodes in between (for example,
Shaper)
Rename the ports to something clear such as In and Out so the source graph stays easy to read and maintain.
Quick Start
- Create a new Gaea file.
- Add a
MacroPortnode, rename it toIn, and setDirectiontoInput. - Add a second
MacroPort, rename it toOut, and setDirectiontoOutput. - Set the
Displaytype for each port as needed, such asHeightfield,Mask, orColor. - Place your processing nodes between them (for example, add a
Shaper). - Wire the graph so the flow is
In > (your nodes) > Out(for example,In > Shaper > Out). - Enable
Is Optionalon anyMacroPortthat should not be required.
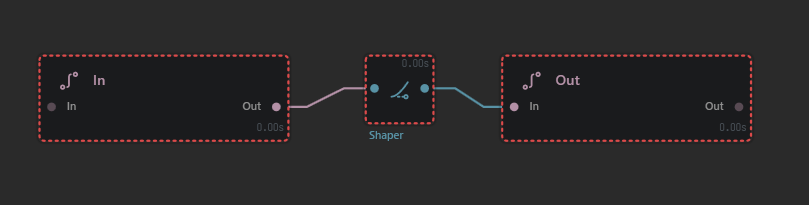
A simple Macro graph built with MacroPort > Shaper > MacroPort.
Expose parameters (bind internal settings)
To expose a setting from a node inside the Macro:
- Select the internal node (for example,
Shaper). - In its Properties panel, click the diamond Property Editor for the setting you want to expose.
- Choose
Bind to > New variableto create a new exposed control, or bind to an existing variable. - Give the variable a clear name and sensible range.

Create a new exposed variable from any internal node property.
Repeat for any other settings you want to control from outside the Macro. These exposed variables become the user-facing controls for the Macro and can also be driven through automation. For more background, see Variables and Expressions.
Export the Macro
- Go to
File > Export > Macro... - Fill in the metadata such as author name, Macro name, version, and description.
- Choose whether to save the
.macrofile, install it in Gaea, or both. - Export the Macro.
- Restart Gaea to test the Macro.
Once the ports are named and the graph is wired, the Macro is ready to export.
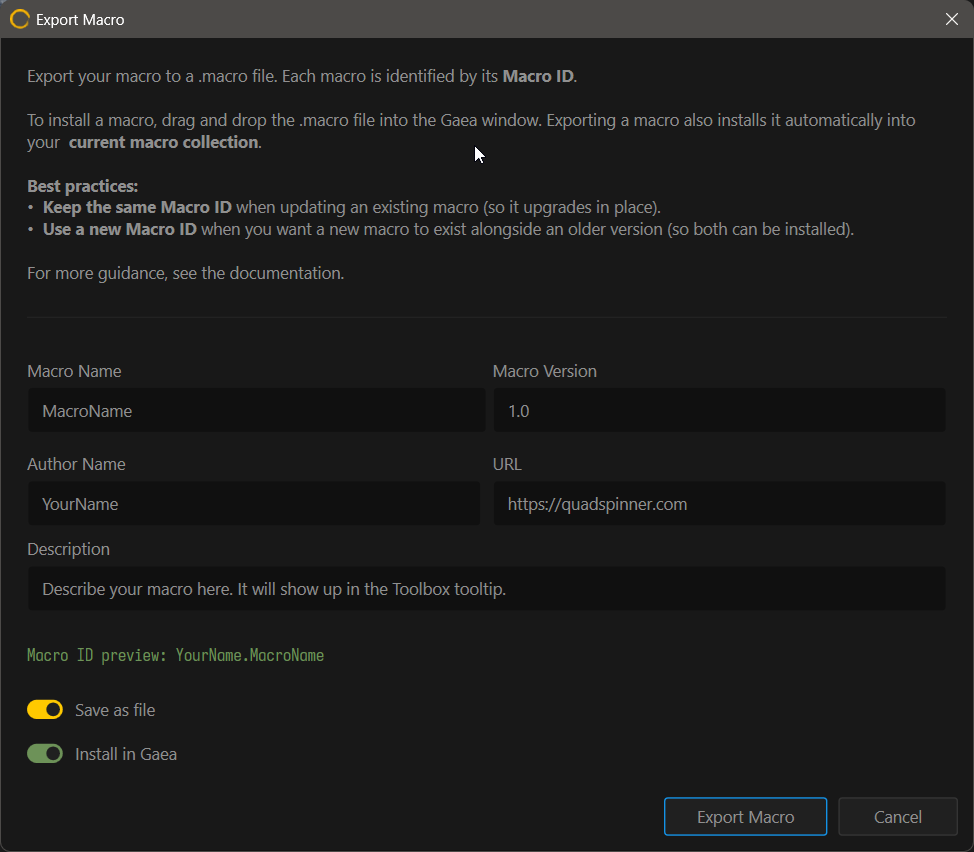
Use the export dialog to define metadata, review the Macro ID, and optionally install the Macro into Gaea.
Keep the original Macro source .terrain file. The exported .macro is the installable package, but the source file is what you should reopen when you want to edit, fix, or improve the Macro later.
Install and use a Macro
- Install a Macro by dragging the
.macrofile into Gaea, or useFile > Import > Macro. - Installed Macros are stored in
\Data\Macrosinside your Gaea installation and can be accessed quickly through theArtifact Explorer. - Create the Macro by searching for its Macro name in the toolbox or search like any other node.
Install a Macro by dragging the .macro file into Gaea, then search for it by name like any other node.
Edit a Macro
- Open the original Macro source
.terrainfile. - Modify nodes, connections,
MacroPortdefinitions, and bindings as needed. - Export the Macro again (
File > Export > Macro...). - Keep the same Macro ID if you want the installed Macro to update in place, and increase the version or revision number so the update is easy to track.
- Restart Gaea to ensure the updated Macro is loaded.